Menu
- Home
- Skeleton Handprints Creative Activity
skeleton handprints


intro:
A unique twist on handprint activities! Creating these spooky handprints is not only fun for the Halloween season, but is also a great opportunity to discuss the human skeleton, bones and x-rays!
set up ideas:
To begin this activity, you may wish to show off examples of X-rays or models of the human skeleton. This will help children visually understand the bones that make up their hands and bodies.
let's get started
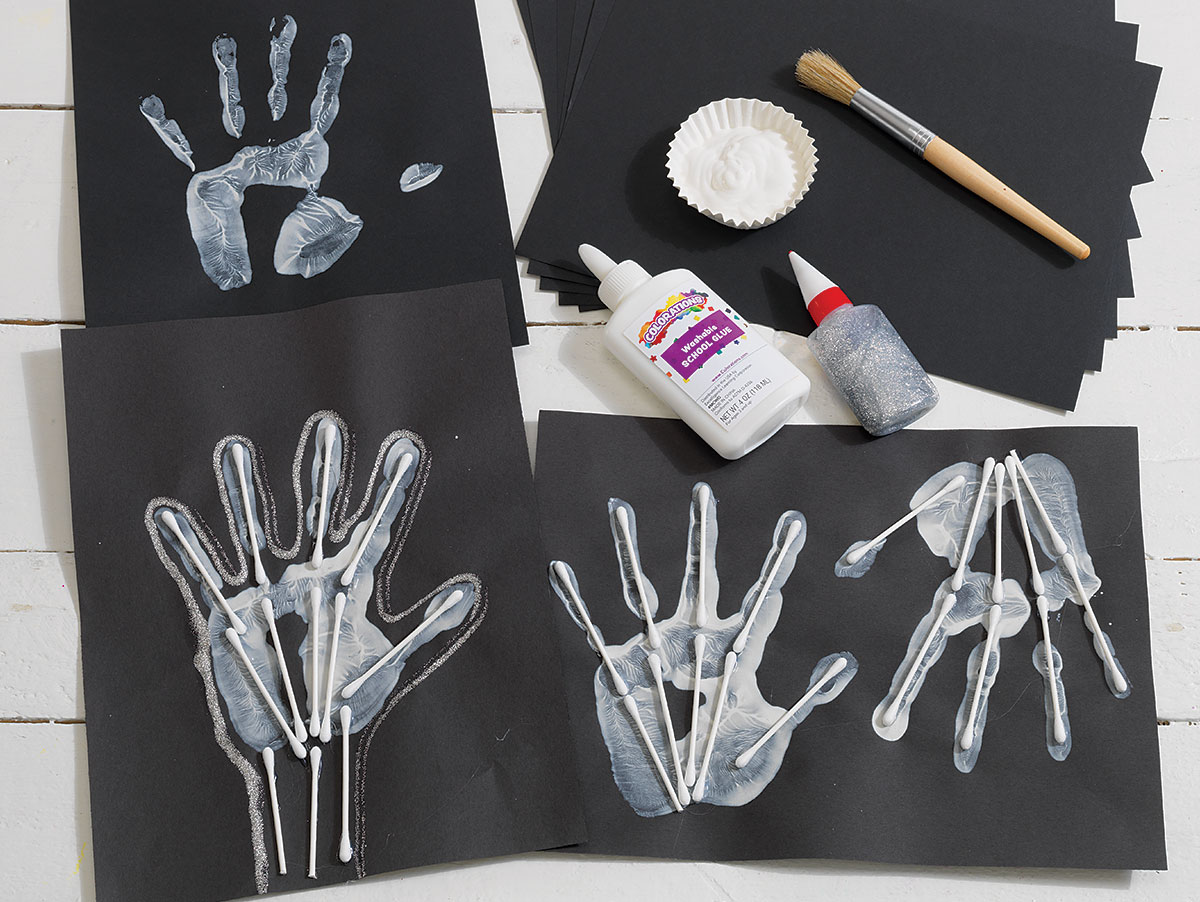
For these spooky skeleton handprints, you'll need to gather black construction paper, white paint (BioColor®, Simple Washable Tempera or washable finger paints all work great), cotton swabs and either paint trays or craft cups with paint brushes to apply paint to the children's hands.
step 1
Pour white paint into a tray large enough for children to dip their hands into. Alternatively, paint children's hands using a white foam brush.
Pour white paint into a tray large enough for children to dip their hands into. Alternatively, paint children's hands using a white foam brush.
step 2
Dip a hand into white paint or brush a hand to coat it with paint and then press against a sheet of black construction paper to form a handprint.
Dip a hand into white paint or brush a hand to coat it with paint and then press against a sheet of black construction paper to form a handprint.
step 3
While the handprint dries, cut several cotton swabs as needed so that they are roughly the length of the fingers.
While the handprint dries, cut several cotton swabs as needed so that they are roughly the length of the fingers.
step 4
Glue halved and whole cotton swabs as needed along the fingers and onto the palm to create a skeletal handprint.
Glue halved and whole cotton swabs as needed along the fingers and onto the palm to create a skeletal handprint.
This activity not only provokes conversation on spooky Halloween décor, but also presents a great chance to discuss bones, the skeletal system and X-rays. Discuss whether any of the children have had X-rays taken and what it is like to see the bones that make up our bodies.
Cutting the cotton swabs in half may help them to better fit the length of children's fingers. For more colorful, expressive skeletons, try using colored cotton swabs.
 Follow up Activity
Challenge children to continue using cut and whole cotton swabs to create a full skeleton!


