Menu
- Home
- Tape Mummies Creative Activity
tape mummies


intro:
Mummies come alive in this fun and simple activity! Layering the masking tape to create a mummy design is not only fun, but a great way to build fine motor skills. A terrific process art activity for cultivating creativity.
set up ideas:
This activity doesn't need many supplies, but you can jazz up your mummies by providing different colors and patterns of craft tape. After all, Halloween is a time for dressing up!
let's get started
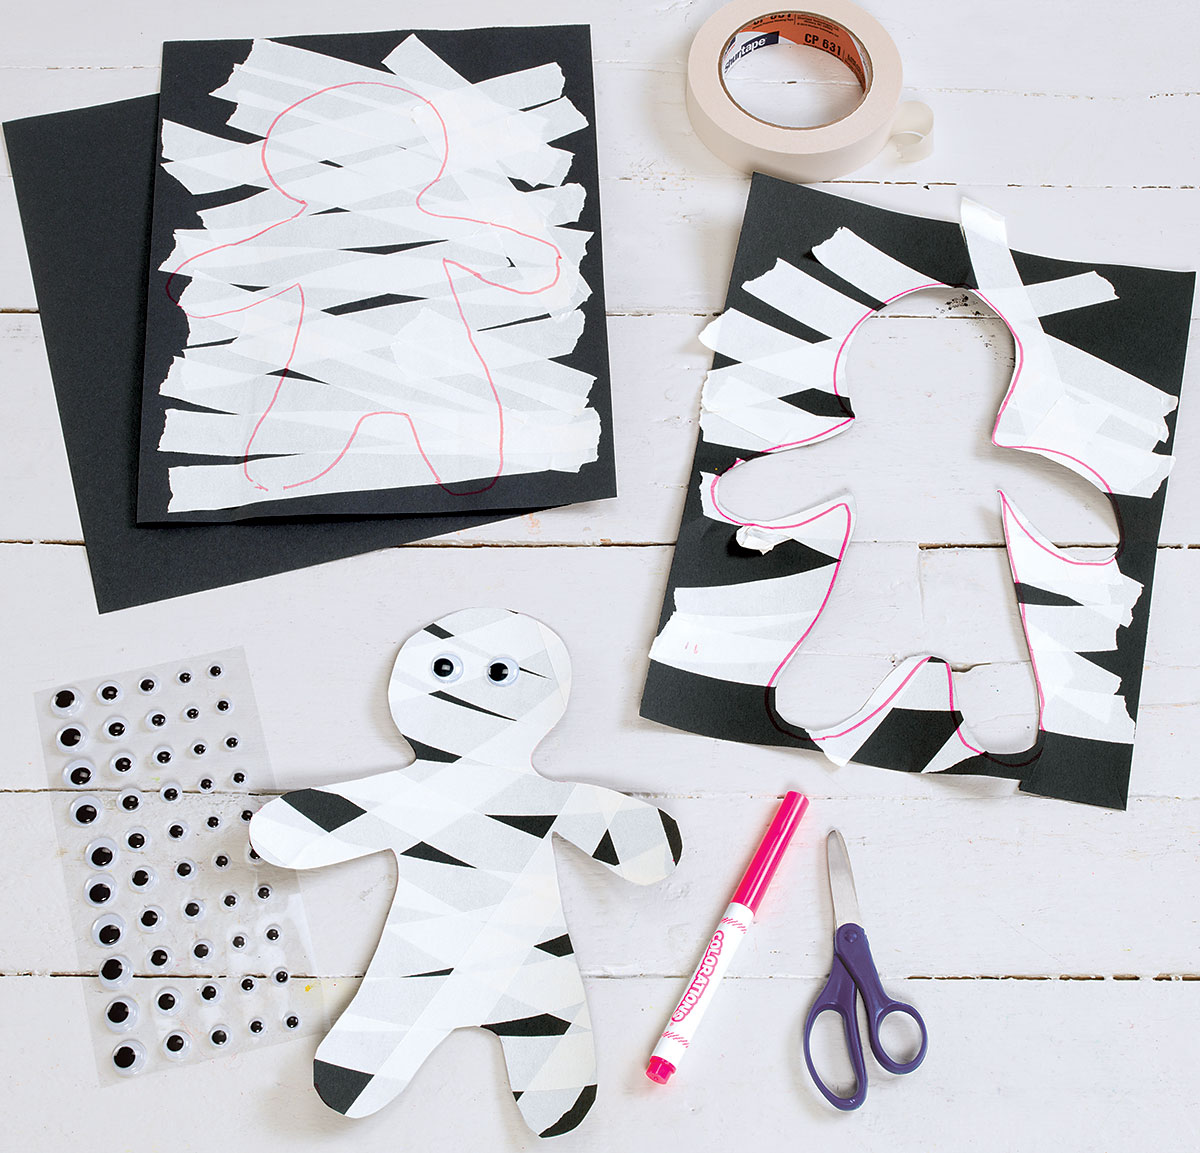
Making these mummies is super manageable. All you'll need are black sheets of construction paper, masking tape or silver washi tape, scissors and wiggly eyes. Children may write their names on the backs of the mummies using white crayon.
step 1
Cut or tear strips of masking tape or washi tape roughly as wide as a sheet of construction paper.
Cut or tear strips of masking tape or washi tape roughly as wide as a sheet of construction paper.
step 2
Add the strips of tape onto the construction paper. Keep them mostly horizontal with some variation and layer some strips over each other.
Add the strips of tape onto the construction paper. Keep them mostly horizontal with some variation and layer some strips over each other.
step 3
Trace the shape of a person over the tape-covered sheet of construction paper.
Trace the shape of a person over the tape-covered sheet of construction paper.
step 4
Cut the traced shape out and add wiggly eyes to bring your mummy to life!
Cut the traced shape out and add wiggly eyes to bring your mummy to life!
Mummies have been found all over the world across many different cultures. While the classic depiction of a mummy is a deceased person dressed in bandages, this is not often the case. A mummy can be produced by specialized embalming methods or naturally in environments of extreme cold or lack of humidity.
You may cut or tear the tape before beginning, or simply cut each strip as you go along adding them to the construction paper. Try to do some light layering and adjusting the angles of each piece of tape.
 Follow up Activity
Trace the outline of your mummy onto a few other sheets of construction paper and decorate them as desired. Cut out a shirt, pants and hat and now you have a paper doll mummy!


